
Introduction
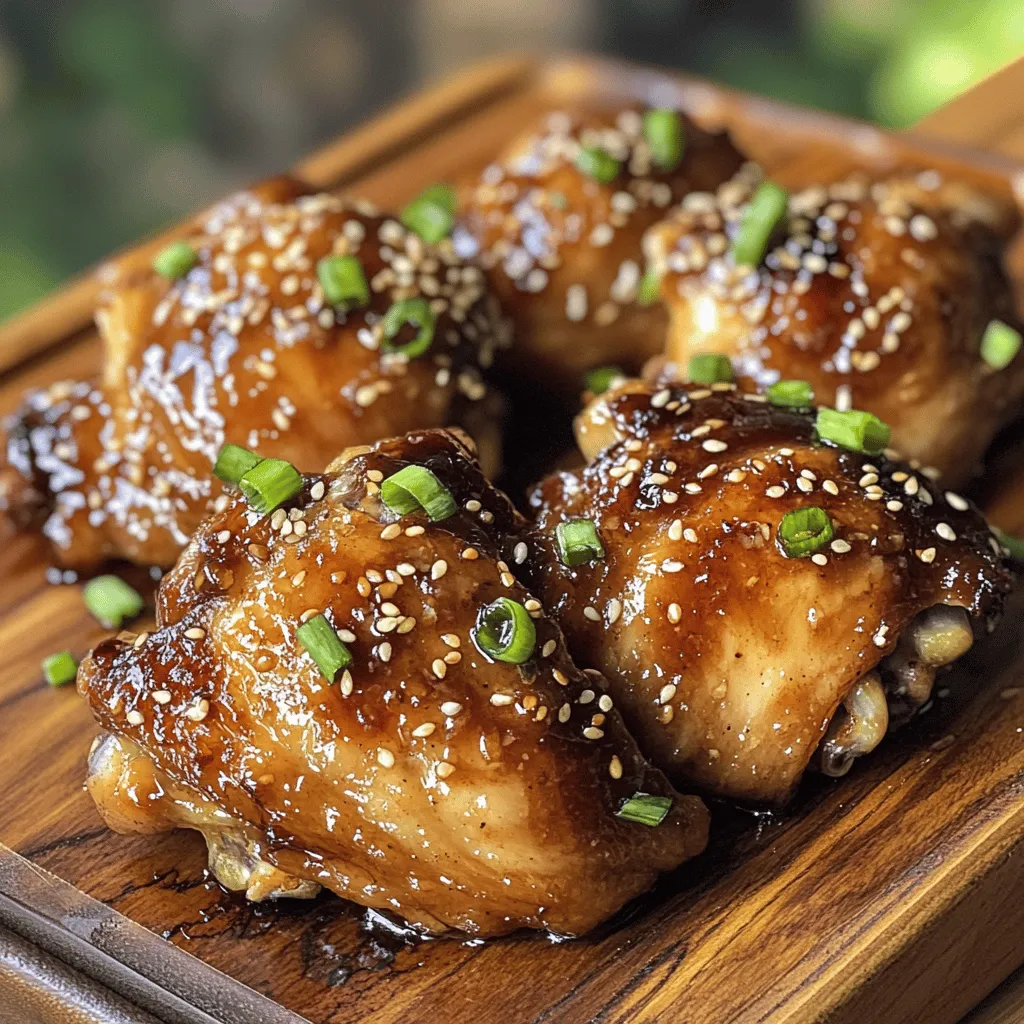
Welcome to a culinary adventure that marries sweetness with savory delight: Sweet & Sticky Honey Garlic Chicken. This dish has captured the hearts and palates of many, transforming a simple weeknight dinner into a delightful feast. Featuring tender chicken thighs glazed in a luscious honey garlic sauce, it’s no wonder this recipe is a go-to for families and busy professionals alike.
In today’s fast-paced world, easy-to-make recipes that deliver big flavors are essential. With just a handful of ingredients and minimal prep time, this honey garlic chicken checks all the boxes. It’s perfect for those evenings when you want something delicious yet uncomplicated. The balance of sweet honey and robust garlic creates a flavor profile that is both satisfying and mouthwatering, making it a hit among both adults and children.
Whether served over rice, noodles, or paired with steamed vegetables, this dish is versatile and appealing, making it a staple in many kitchens. As we dive into this recipe, let’s take a closer look at the ingredients that make this dish shine and how to prepare it for maximum flavor.
Understanding the Ingredients
Chicken Thighs: The Preferred Choice
When it comes to chicken, the choice of meat can significantly impact the final dish. For Sweet & Sticky Honey Garlic Chicken, chicken thighs are preferred over chicken breasts. This preference stems from their higher fat content, which keeps the meat moist and juicy during cooking. The slightly richer flavor of thighs elevates the overall taste of the dish and allows it to absorb the marinade beautifully. Additionally, chicken thighs are less prone to drying out, making them a more forgiving option, especially for those new to cooking.
Honey: The Sweet Element
At the heart of this recipe lies the honey, which not only brings sweetness but also helps create that signature sticky glaze. Honey plays a dual role in this dish: it balances the savory elements while adding a rich, luxurious texture to the sauce. When cooked, honey caramelizes beautifully, enhancing the flavors and contributing to the dish’s appealing sheen. Opt for pure, raw honey for the best taste and health benefits, as it offers more complex flavors compared to processed varieties.
Soy Sauce: Adding Umami and Depth
Soy sauce is a key ingredient in many Asian-inspired dishes, and it plays a crucial role in the flavor profile of honey garlic chicken. This fermented sauce adds depth and umami, the fifth taste that enhances the overall flavor experience. The saltiness of soy sauce complements the sweetness of honey, creating a perfect balance. For those watching their sodium intake, low-sodium soy sauce can be used without compromising the dish’s integrity.
Garlic and Ginger: Essential Aromatics
Garlic and ginger are the aromatic powerhouses that elevate this dish from good to unforgettable. Garlic provides a pungent depth, while ginger adds a subtle warmth and spice. Together, they create a fragrant base for the sauce, infusing each bite with flavor. Fresh garlic and ginger are recommended for the best results, as they offer a more vibrant taste compared to their powdered counterparts.
Apple Cider Vinegar: The Tangy Component
To brighten the dish and cut through the sweetness, apple cider vinegar is added. This tangy ingredient helps to balance the richness of the honey and chicken fat, providing a refreshing contrast. Apple cider vinegar also adds a slight acidity that enhances the overall flavor profile, making every bite more dynamic.
Sesame Oil: A Touch of Nutty Flavor
A drizzle of sesame oil rounds out the sauce, introducing a nutty flavor that complements the other ingredients beautifully. This oil is often used in Asian cuisine and adds a unique richness to the dish. It’s best to use toasted sesame oil for its deeper flavor, but a lighter version can also be used if preferred.
Cornstarch: Thickening the Sauce
Cornstarch is a vital ingredient for achieving that coveted sticky glaze. When mixed with water and added to the sauce, it thickens the liquid, allowing it to cling to the chicken beautifully. This step is crucial for creating the perfect texture that makes honey garlic chicken so irresistible.
Garnishes: Green Onions and Sesame Seeds
Presentation matters, especially for a dish that’s as visually appealing as it is delicious. Sliced green onions add a pop of color and a fresh crunch, while sesame seeds provide a subtle nuttiness and an attractive finish. These garnishes not only enhance the visual appeal but also introduce additional layers of flavor and texture.
Preparation of Sweet & Sticky Honey Garlic Chicken
Marination Process
Now that we have explored the key ingredients, it’s time to prepare the Sweet & Sticky Honey Garlic Chicken. The marination process is an essential step that allows the flavors to penetrate the chicken, resulting in a deliciously seasoned dish.
To start, combine your honey, soy sauce, minced garlic, grated ginger, apple cider vinegar, and sesame oil in a bowl. Whisk them together until fully incorporated. This mixture will serve as both a marinade and a cooking sauce, making it easy to achieve that sweet and sticky consistency.
Place your chicken thighs in a large resealable plastic bag or a shallow dish, and pour the marinade over the top, ensuring the chicken is well coated. Seal the bag or cover the dish, and allow the chicken to marinate in the refrigerator. For the best flavor infusion, aim for a marination time of at least 30 minutes, though a few hours or overnight is ideal. This extra time allows the flavors to meld and results in a more delicious and tender chicken.
Step-by-Step Cooking Process
Once you’ve allowed the chicken to marinate, it’s time to cook. Here’s a step-by-step guide to ensure your Sweet & Sticky Honey Garlic Chicken turns out perfectly:
1. Preheat the Pan: Begin by heating a large skillet or frying pan over medium-high heat. A non-stick or cast-iron skillet works best for this recipe.
2. Sear the Chicken: Remove the chicken thighs from the marinade, letting any excess drip off. Reserve the marinade for later use. Once the pan is hot, add a small amount of oil if necessary, then place the chicken thighs skin-side down (if using skin-on thighs) in the pan. Sear for about 5-7 minutes until the chicken is golden brown and crispy.
3. Flip and Cook: Carefully flip the chicken thighs and cook for another 5-7 minutes until they are browned on the other side. At this point, the chicken should be nearly cooked through.
4. Add the Marinade: Pour the reserved marinade into the pan with the chicken. Bring it to a simmer, allowing the sauce to bubble and reduce slightly. This step helps to deepen the flavors and creates that sticky glaze we all love.
5. Thicken the Sauce: In a small bowl, mix cornstarch with a tablespoon of water to create a slurry. Slowly drizzle the slurry into the simmering sauce while stirring continuously. This will thicken the sauce to your desired consistency.
6. Finish Cooking: Continue cooking the chicken in the sauce for an additional 5 minutes, ensuring it reaches an internal temperature of 165°F (74°C). This final cook not only ensures the chicken is fully cooked but also allows it to absorb the delicious flavors of the sauce.
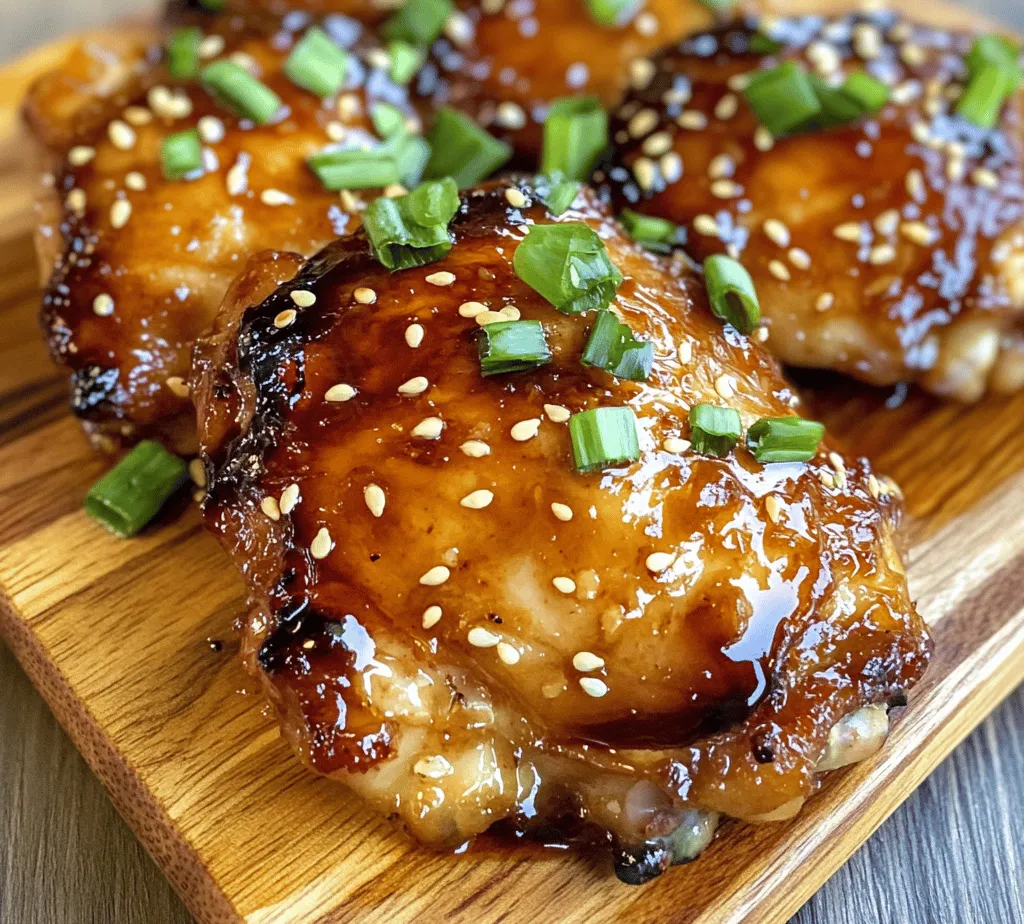
7. Serve and Garnish: Once cooked, transfer the chicken to a serving plate, spooning the thickened sauce over the top. Garnish with sliced green onions and a sprinkle of sesame seeds for a beautiful presentation.
Now that you have a detailed understanding of how to prepare Sweet & Sticky Honey Garlic Chicken, you are well on your way to creating a dish that will impress your family and friends. Enjoy the process, and savor every bite of this irresistible meal!
Tips for Achieving the Perfect Sear on Chicken Thighs
Achieving a perfect sear on chicken thighs is crucial for developing flavor and texture in your Sweet & Sticky Honey Garlic Chicken. Here are some tips to ensure your chicken turns out beautifully golden brown every time:
1. Pat Dry: Begin by patting the chicken thighs dry with paper towels. Moisture on the surface of the chicken will create steam instead of allowing for that desirable sear. Removing excess moisture helps the exterior crisp up nicely.
2. Preheat the Pan: Use a heavy-bottomed skillet or a cast-iron pan, and preheat it over medium-high heat before adding oil. A hot pan ensures that once the chicken hits the surface, it starts to brown immediately.
3. Use the Right Oil: Choose an oil with a high smoke point, such as canola, grapeseed, or avocado oil. These oils can withstand higher temperatures without burning, allowing the chicken to sear properly.
4. Don’t Overcrowd the Pan: Avoid placing too many chicken thighs in the pan at once. Overcrowding will lower the temperature of the pan and lead to steaming rather than searing. Cook in batches if necessary.
5. Let it Cook: Once the chicken is in the pan, resist the urge to move it around. Let it cook undisturbed for about 5-7 minutes on the first side. This will allow a nice crust to form. Flip only once the chicken releases easily from the pan.
Importance of Reserving Marinade for Sauce Preparation
Reserving a portion of the marinade used for your chicken is essential for creating a flavorful sauce. The marinade not only tenderizes the chicken but infuses it with rich flavors that you can enhance in the sauce. Here’s why reserving marinade is key:
– Flavor Concentration: The marinade contains all the components that make this dish delectable—honey, garlic, soy sauce, and spices. When reduced, these flavors concentrate, creating a deliciously sticky and rich sauce that complements the chicken perfectly.
– Safety First: Always set aside a portion of the marinade before adding raw chicken. This ensures that you have a safe, uncontaminated sauce to use later.
Creating the Sauce
The sauce in Sweet & Sticky Honey Garlic Chicken is the star of the show, adding depth and sweetness to the dish. Here’s how to create this delightful sauce:
The Science Behind Thickening Sauces with Cornstarch
Cornstarch is a powerful thickening agent, crucial for achieving that glossy, sticky sauce. Here’s how it works:
– Gelatinization: When cornstarch is heated in a liquid, it absorbs moisture and swells, creating a gel-like consistency. This transforms your sauce from a thin liquid into a thick, luscious coating for your chicken.
How to Achieve the Right Consistency
To achieve the perfect sauce consistency, follow these steps:
1. Mix the Cornstarch: In a small bowl, mix equal parts cornstarch and cold water to create a slurry. This prevents clumping when added to the hot sauce.
2. Simmer the Marinade: Pour the reserved marinade into a saucepan and bring it to a simmer. Allow it to cook for a few minutes to develop the flavors further.
3. Add the Slurry: Gradually whisk the cornstarch slurry into the simmering marinade. Stir continuously until you notice the sauce thickening, usually within a minute or two.
4. Test the Consistency: If the sauce is too thin, add a little more slurry and simmer until it thickens to your desired consistency. If it’s too thick, you can add a splash of water or broth to loosen it up.
Importance of Combining Flavors from the Marinade in the Sauce
Combining flavors from the marinade into the sauce ensures a cohesive dish. The sauce becomes a perfect extension of the chicken, enhancing every bite with the same sweet and savory notes that marinated the meat. This layer of flavor is what makes the dish truly stand out.
Glazing the Chicken
Once your chicken is perfectly cooked, and the sauce is ready, it’s time to glaze the chicken. This process elevates your dish both in flavor and presentation:
Techniques for Evenly Coating Chicken with Sauce
1. Remove Chicken from Heat: Once the chicken is cooked through, remove it from the heat. Allow it to rest for a few minutes; this helps retain its juices.
2. Coat Generously: Place the chicken back in the pan or in a bowl and pour the thickened sauce over the top. Use tongs or a spatula to turn the chicken, ensuring each piece is evenly coated.
3. Simmer for Extra Flavor: For an even more intense flavor, return the glazed chicken to the heat for an additional minute or two. This allows the sauce to cling better to the chicken and enhances its stickiness.
Discussing the Visual Appeal of Glazed Chicken
Glazed chicken is not only delicious but visually appealing. A shiny, caramelized exterior makes each piece look irresistible. The golden brown hue created by the sear combined with the glossy sauce makes for a beautiful presentation that will impress your family and guests.
Suggestions for Adjusting Sauce Thickness if Needed
If you find your sauce too thick or too thin after glazing, it’s easy to adjust:
– If Too Thick: Gradually whisk in a small amount of water or chicken stock over low heat until you reach the desired consistency.
– If Too Thin: Continue to simmer the sauce for a longer time to allow more evaporation, or add a bit more cornstarch slurry if necessary.
Serving Suggestions
The Sweet & Sticky Honey Garlic Chicken pairs wonderfully with various sides that complement its flavors. Here are some suggestions:
Ideal Pairings
– Steamed Rice: A classic pairing, steamed jasmine or basmati rice soaks up the extra sauce beautifully. The simplicity of the rice allows the chicken to shine.
– Vegetables: Roasted or sautéed vegetables like green beans, broccoli, or bell peppers add color and nutrition to your plate, making for a balanced meal.
– Salads: A fresh salad with a tangy vinaigrette can balance the sweetness of the chicken. Opt for mixed greens, cucumber, and a sprinkle of sesame seeds for added texture.
Serving Styles: Plating Tips and Garnishing Ideas
– Plating: Arrange the chicken thighs on a serving platter, drizzling any remaining sauce over the top. For an elegant presentation, consider placing the chicken on a bed of rice or alongside colorful vegetables.
– Garnishing: Fresh herbs like chopped green onions or cilantro not only add a pop of color but also a burst of freshness that enhances the dish. A sprinkle of sesame seeds can add a nutty crunch.
Nutritional Information
Understanding the nutritional benefits of the ingredients used in Sweet & Sticky Honey Garlic Chicken can help you enjoy this dish within a healthy diet:
– Chicken Thighs: Rich in protein, chicken thighs provide essential amino acids necessary for muscle repair and growth. They also contain iron and zinc, which support a healthy immune system.
– Honey: While it adds sweetness, honey also contains antioxidants and has antibacterial properties. Moderation is key, but a little honey can be a healthier alternative to refined sugars.
– Garlic: Known for its health benefits, garlic is rich in vitamins C and B6, manganese, and selenium. It’s also linked to improved heart health and immune function.
– Soy Sauce: A source of umami flavor, soy sauce adds depth to the dish. Opt for low-sodium varieties to keep the sodium content in check.
Balancing this dish with steamed vegetables or a light salad can make it a wholesome meal that fits into a balanced diet.
Conclusion
Sweet & Sticky Honey Garlic Chicken is a simple yet flavorful dish that’s sure to become a favorite in your household. Its combination of savory, sweet, and umami flavors provides a delightful experience for the palate. The ease of preparation makes it perfect for family dinners or gatherings, allowing you to impress guests without spending hours in the kitchen.
Encouragement to try making this dish for family meals or gatherings is highly recommended. The joy of cooking and sharing delicious recipes is a gratifying experience that brings people together. Embrace the flavors and the process, and enjoy the satisfaction that comes from creating a dish that everyone will love. Whether you’re an experienced cook or just starting, this Sweet & Sticky Honey Garlic Chicken is a recipe that will not only satisfy your taste buds but also enhance your culinary skills.
