

Introduction
If you’re looking for a dessert that brings nostalgia, fun, and a touch of whimsy to your gatherings, look no further than OREO Dirt Cake. This playful dessert has become a staple at parties, picnics, and family celebrations for its rich flavors and creative presentation. The magic of OREO Dirt Cake lies not only in its delicious taste but also in its ability to evoke memories of childhood treats, making it a perfect choice for both young ones and the young at heart.
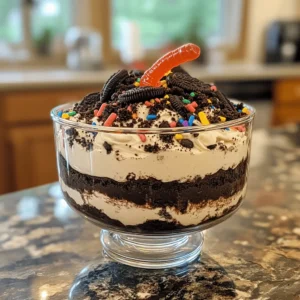
The popularity of OREO Dirt Cake can be attributed to its simplicity and the joy it brings to any occasion. It’s a dessert that allows even novice bakers to shine in the kitchen, requiring minimal effort while delivering maximum impact. The basic components come together to create a stunning layered cake, beautifully resembling a pot of dirt and adorned with gummy worms and colorful sprinkles that are sure to delight any crowd.
This recipe celebrates a playful approach to dessert, inviting creativity and personalization. Whether you’re hosting a birthday party, a backyard barbecue, or simply want to whip up something fun for a family dinner, OREO Dirt Cake is the perfect solution.
The Magic of OREO Dirt Cake
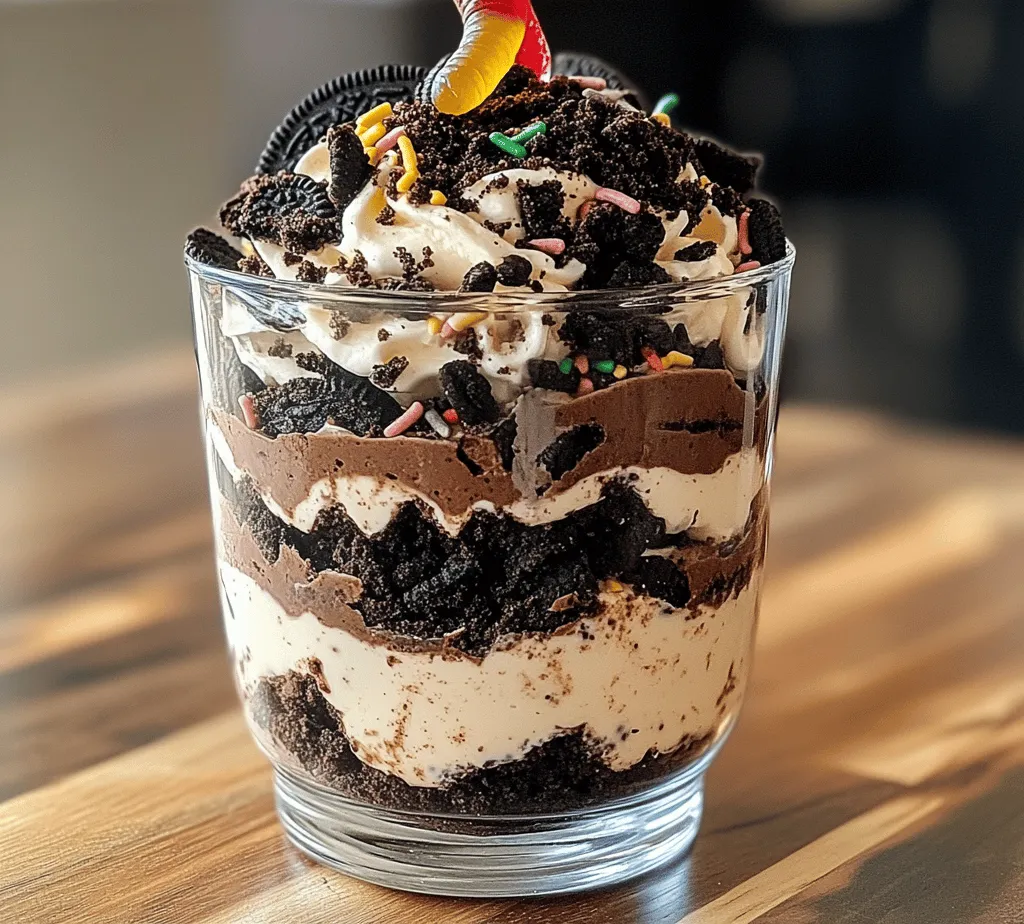
What sets OREO Dirt Cake apart is its delightful combination of textures and flavors. Imagine layers of creamy, rich chocolate mingling with the crunchy, crumbly goodness of OREO cookies. Each bite offers a unique experience—smoothness from the cream cheese mixture, followed by the satisfying crunch of crushed OREOs, all topped off with a light, fluffy Cool Whip layer.
At the heart of this dessert is its rich chocolate flavor, stemming from instant chocolate pudding mix, which provides both depth and structure to the cake. The creamy layers create a perfect contrast to the crumbly OREO base, making every forkful enjoyable. This dessert is not just a treat; it’s an experience that combines familiar flavors in a new and exciting way.
One of the most appealing aspects of OREO Dirt Cake is its versatility. While the classic recipe is a crowd-pleaser, there are countless ways to customize it for different occasions. Want to make it festive for Halloween? Add some orange and black sprinkles alongside gummy worms. Hosting a birthday party? Incorporate colorful sprinkles for a more celebratory vibe. The possibilities are endless, allowing you to tailor this dessert to suit your theme or personal preferences.
Ingredients Breakdown
Before diving into the step-by-step instructions, it’s essential to understand the key ingredients that make OREO Dirt Cake so delightful. Here’s a breakdown of each component and its role in this scrumptious recipe:
– OREO Cookies: The backbone of this dessert, OREO cookies provide the signature chocolate flavor and texture. When crushed, they form a deliciously crumbly base that mimics the look of dirt, setting the stage for the layers to come.
– Unsalted Butter: This ingredient is crucial for achieving a creamy texture in the cream cheese mixture. The richness of unsalted butter enhances the overall flavor, ensuring that each bite is decadent.
– Cream Cheese: Essential for the dessert’s base layer, cream cheese adds a tangy richness that balances the sweetness of the other ingredients. Its creamy consistency helps create a smooth layer that pairs perfectly with the crunch of OREOs.
– Powdered Sugar: To sweeten the cream cheese layer, powdered sugar is used. Its fine texture allows for easy incorporation, creating a fluffy and light mixture that complements the denser layers below.
– Vanilla Extract: A splash of vanilla extract elevates the flavor of the cream cheese mixture, adding depth and warmth that rounds out the overall taste of the dessert.
– Cool Whip Topping: This light and airy whipped topping is key to achieving the fluffy texture of the dessert. It lightens the cream cheese layer, creating a delightful contrast to the denser elements.
– Milk: Milk is necessary for activating the instant pudding mix, contributing to the creamy consistency of the dessert. It also helps to blend all the components seamlessly together.
– Instant Chocolate Pudding Mix: This is the star of the show when it comes to flavor. Instant chocolate pudding mix provides the rich chocolatey taste that OREO Dirt Cake is known for, while also giving structure to the layers.
– Garnishes: While optional, gummy worms and chocolate sprinkles make for fun decorations that enhance the dessert’s playful appearance. These whimsical toppings add a festive touch and make the cake even more appealing to children and adults alike.
Step-by-Step Instructions for Making OREO Dirt Cake
Now that you’re familiar with the ingredients and their purpose, let’s dive into the step-by-step instructions for creating this delightful OREO Dirt Cake. Follow these detailed steps to ensure your dessert turns out perfectly every time.
Step 1: Gather Your Ingredients
Before you start baking, make sure you have all the necessary ingredients on hand. This will streamline your process and ensure that you don’t miss anything important. Here’s what you’ll need:
– 1 package OREO cookies (about 15-18 cookies)
– 1/2 cup unsalted butter, softened
– 8 oz cream cheese, softened
– 1 cup powdered sugar
– 1 teaspoon vanilla extract
– 1 cup Cool Whip topping
– 2 cups milk
– 2 packages (3.4 oz each) instant chocolate pudding mix
– Gummy worms and chocolate sprinkles (for garnish, optional)
Step 2: Prepare the OREO Crust
Begin by crushing the OREO cookies to create the base of your cake. You can do this by placing the cookies in a zip-top bag and using a rolling pin to crush them into fine crumbs. Alternatively, you can use a food processor for a quicker method. Aim for a consistency that resembles sand, ensuring there are no large chunks remaining.
Once your cookies are crushed, transfer them to a mixing bowl and combine with the softened unsalted butter. Use a fork or your hands to mix until the crumbs are evenly coated with butter and the mixture holds together when pressed. This will form the crust for your cake.
Step 3: Create the Cream Cheese Layer
In a separate mixing bowl, beat the softened cream cheese with an electric mixer until it’s smooth and creamy. Gradually add the powdered sugar and continue mixing until well combined. Don’t forget to scrape down the sides of the bowl to ensure everything is mixed evenly.
Next, add the vanilla extract and continue to blend until the mixture is completely smooth. At this point, gently fold in the Cool Whip topping until fully incorporated. This will create a light and fluffy cream cheese layer that will contrast beautifully with the other textures in the cake.
Step 4: Prepare the Chocolate Pudding Mixture
In another bowl, whisk together the instant chocolate pudding mix and milk. Follow the instructions on the pudding package, typically mixing for about 2 minutes until the pudding thickens. Make sure there are no lumps present, as this will affect the final texture of your dirt cake.
Step 5: Assemble the Layers
Now it’s time to assemble your OREO Dirt Cake! Start by layering half of the crushed OREO mixture at the bottom of a 9×13-inch dish or a trifle bowl for a more stunning presentation. Press the crumbs down gently to create an even base.
Next, spread the cream cheese mixture evenly over the OREO crust, smoothing it out with a spatula. Follow this layer with the chocolate pudding mixture, spreading it evenly across the cream cheese layer.
Finally, top the pudding layer with the remaining crushed OREOs, creating another even layer of crumbs. This will help create the “dirt” effect that is so iconic to this dessert.
Step 6: Chill
Once assembled, cover the dish with plastic wrap or a lid and refrigerate the OREO Dirt Cake for at least 4 hours, or preferably overnight. This chilling time allows the flavors to meld together and the layers to set properly, ensuring a delightful texture when served.
As you can see, making OREO Dirt Cake is a straightforward process that results in a deliciously fun dessert. With its rich flavors and playful presentation, this cake is sure to be a hit at your next gathering. Get ready to enjoy the excitement and joy this dessert brings to the table!
Crushing the Oreos: Techniques for Achieving the Perfect Crumb Texture
To start your OREO Dirt Cake, the first step involves properly crushing the Oreos. The texture of the crumb is crucial for achieving that classic “dirt” look and feel. There are several effective methods for crushing Oreos, and each can yield differing results based on your preferences.
1. Using a Food Processor: This is arguably the easiest and fastest method. Simply place the Oreos in the food processor and pulse until you achieve a fine crumb. Be cautious not to over-process; you want crumbs, not dust. A few larger pieces can add a nice texture to the cake.
2. Ziploc Bag Method: If you don’t have a food processor or prefer a hands-on approach, place the Oreos in a large Ziploc bag, seal it tightly, and crush using a rolling pin. This method allows you to control the size of the crumbs more easily. Use a firm but gentle pressure, ensuring you don’t create larger chunks.
3. Manual Crushing: For those who enjoy a more traditional approach, you can crush the Oreos manually using a rolling pin or even the bottom of a glass. Place the cookies between two sheets of parchment paper to minimize mess, and crush them to your desired consistency.
Whichever method you choose, aim for a crumb that resembles coarse sand. This texture will help create the illusion of dirt while providing that signature Oreo flavor throughout the cake.
Making the Cream Cheese Mixture: Tips for Achieving a Smooth and Creamy Consistency
Once your Oreos are crushed, it’s time to prepare the cream cheese mixture. This layer is essential for providing a rich, creamy contrast to the crunchy Oreo layer. Here are some tips for ensuring your cream cheese mixture is perfectly smooth:
1. Room Temperature Cream Cheese: Start with cream cheese that is at room temperature. Cold cream cheese is difficult to blend smoothly and can leave lumps in your mixture. To speed up the process, you can cut the cream cheese into small cubes and let it sit out for about 30 minutes before mixing.
2. Use a Hand Mixer or Stand Mixer: Using an electric mixer will make it easier to achieve a smooth consistency. Beat the cream cheese alone for a minute or two, then gradually add in powdered sugar and vanilla extract. Mix until the mixture is free of lumps and creamy.
3. Add Heavy Cream or Milk: If you find your mixture is too thick, consider adding a splash of heavy cream or milk. This adjustment will not only help achieve a smoother texture but also contribute to a silkier mouthfeel.
Folding in the Whipped Topping: Importance of Being Gentle to Maintain Fluffiness
The next step involves folding in the whipped topping, which adds a light and airy texture to the cream cheese mixture. This step is critical, as over-mixing can deflate the whipped topping, leading to a denser filling. Here are some tips for achieving the perfect fold:
1. Use a Rubber Spatula: A rubber spatula is ideal for gently folding ingredients together. It allows you to lift the mixture from the bottom of the bowl and fold it over the whipped topping without deflating it too much.
2. Incorporate Gradually: Start by adding a small amount of whipped topping to the cream cheese mixture and gently mix it in. This step lightens the cream cheese, making it easier to fold in the remaining whipped topping.
3. Folding Technique: Use a gentle motion, scraping around the edges of the bowl and folding inwards. Turn the bowl as you fold, ensuring that the mixture is combined without losing its volume.
Preparing the Pudding Layer: Emphasizing the Need for Proper Mixing and Resting Time
The pudding layer is another essential component of the OREO Dirt Cake, providing moisture and additional flavor. To prepare it correctly, follow these guidelines:
1. Choosing the Right Pudding: Opt for instant pudding mix to save time and effort. Chocolate pudding works best for that classic dirt cake flavor, but feel free to experiment with vanilla or other flavors to suit your taste.
2. Proper Mixing: In a medium bowl, combine the pudding mix with cold milk as instructed on the package. Use a whisk to mix vigorously until the pudding thickens, which usually takes about 2 minutes. Ensure there are no lumps before proceeding.
3. Resting Time: Let the pudding sit for about 5 minutes before layering it. This resting time allows it to fully set and reach the right consistency for layering.
Layering the Cake: Techniques for Creating Visually Appealing Layers
Creating visually appealing layers is one of the highlights of assembling your OREO Dirt Cake. Here’s how to do it effectively:
1. Choose the Right Dish: A clear glass trifle dish or a large glass bowl works best for showcasing the beautiful layers. The transparency allows guests to see the contrasting colors of the cream, pudding, and Oreo layers.
2. Start with Oreos: Begin by adding a layer of crushed Oreos to the base of your chosen dish. Use about one-third of the crushed cookies for the first layer. Press them down gently to create a solid foundation.
3. Add the Cream Cheese Mixture: Spread half of the cream cheese mixture over the Oreo layer, smoothing it out evenly with a spatula.
4. Next, Add the Pudding: Pour half of the prepared pudding over the cream cheese mixture, spreading it out evenly. Repeat the layering process with the remaining Oreo crumbs, cream cheese mixture, and pudding. Finish with a final layer of Oreos on top.
Final Assembly: Importance of the Reserved Oreo Crumbs and Optional Sprinkles
The final assembly of your OREO Dirt Cake is where the magic happens. The reserved Oreo crumbs are essential for creating that authentic dirt look. Here’s how to finish it off:
1. Top Layer: After adding the final layer of pudding, sprinkle the reserved Oreo crumbs generously over the top. This layer not only adds to the aesthetic appeal but also enhances the flavor.
2. Optional Decorations: For an extra touch of creativity, consider adding sprinkles, gummy worms, or edible flowers on top. Seasonal decorations, such as candy pumpkins for Halloween or chocolate hearts for Valentine’s Day, can also add a festive twist.
3. Final Touches: Before chilling, give a gentle tap on the counter to settle the layers and eliminate any air pockets.
Chilling: Explain the Significance of Chilling Time for Flavor Melding
Chilling is a crucial step in making your OREO Dirt Cake. Here’s why it matters:
1. Flavor Development: Allowing the cake to chill for at least 4 hours, or ideally overnight, enables the flavors to meld together. The creamy filling and pudding absorb the Oreo flavor, resulting in a cohesive taste.
2. Texture Improvement: Chilling helps the layers firm up, making it easier to slice and serve. The pudding layer thickens, providing a delightful contrast to the cream cheese and cookie layers.
3. Serving Temperature: While it’s tempting to dig in right away, waiting gives the dessert a more pleasant texture, as the chilling process allows the ingredients to stabilize.
Chilling and Serving Suggestions
Once your OREO Dirt Cake has chilled, it’s time to serve! The presentation can elevate the overall experience:
1. Presentation Tips: Use a sharp knife to cut clean slices. If you’re serving from a trifle dish, a large spoon can create beautiful portions. Consider garnishing each slice with a dollop of whipped cream, a few Oreo crumbs, or a gummy worm for a playful touch.
2. Serving at Gatherings: OREO Dirt Cake is a crowd-pleaser, perfect for parties, picnics, and family gatherings. The nostalgic appeal and playful presentation often garner enthusiastic reactions from guests, making it a memorable dessert option.
3. Pairing Suggestions: This dessert pairs wonderfully with a scoop of vanilla ice cream or a drizzle of chocolate sauce for those who crave extra sweetness.
Customizations and Variations of OREO Dirt Cake
While the classic OREO Dirt Cake is a delight, there are numerous ways to customize the recipe to suit your taste or occasion:
1. Different Cookie Types: Experiment with different cookie varieties. Substitute chocolate chip cookies or peanut butter cookies for a unique twist on the traditional flavor. Each cookie type will impart its own distinct taste to the cake.
2. Cream Cheese Alternatives: For a change in flavor, substitute cream cheese with mascarpone cheese. This will create a slightly sweeter and creamier filling that pairs well with the Oreos.
3. Additional Flavors: Consider adding flavor extracts, such as mint or caramel, to the cream cheese mixture for an exciting variation. Mint extract can provide a refreshing twist, while caramel can add a rich sweetness.
4. Seasonal Decorations: Adapting your OREO Dirt Cake for holidays can be a fun way to celebrate. For example, use pastel-colored candies for Easter or Halloween-themed sprinkles and candies to suit the season.
Nutritional Information
Understanding the nutritional aspects of OREO Dirt Cake can be beneficial, especially for those monitoring their intake:
1. Overview: While this dessert is indulgent and rich, serving sizes should be considered. Each slice delivers a blend of carbohydrates, fats, and sugars, making it a special treat rather than an everyday dessert.
2. Dietary Preferences: For those seeking alternatives, gluten-free Oreos are available, allowing you to adapt the recipe for gluten-sensitive individuals. You can also explore dairy-free cream cheese and whipped toppings to create a vegan version.
Conclusion
Making and sharing OREO Dirt Cake is a joyful experience that combines simplicity with nostalgia. This dessert not only delights the taste buds but also brings back fond memories of childhood gatherings and celebrations. Its playful presentation and delicious flavors make it a hit at any event, sparking smiles and encouraging second servings.
As you embark on creating this delightful treat, remember the joy it brings to your kitchen and the happiness it spreads among family and friends. So gather your ingredients, unleash your creativity, and enjoy the delightful experience of making OREO Dirt Cake for your next gathering!