


Introduction
Oreo cookies have long captured the hearts of dessert lovers around the world. Known for their iconic chocolate wafer exterior and rich cream filling, these delectable cookies have transcended their original form to inspire a myriad of innovative dessert creations. From cakes to milkshakes, the versatility of Oreos is nothing short of remarkable. One such delightful creation is Oreo Bliss Bites—a simple yet indulgent treat that combines the classic flavors of Oreos with the creamy richness of cream cheese.
What makes Oreo Bliss Bites particularly appealing is their ease of preparation. With minimal ingredients and straightforward steps, these bites are perfect for both novice bakers and seasoned chefs looking for a quick dessert fix. Whether you’re preparing for a party, a family gathering, or simply craving a sweet treat, Oreo Bliss Bites are sure to impress.
Understanding Oreo Bliss Bites
Oreo Bliss Bites deliver an explosion of flavor and texture in every bite. The crunchiness of the Oreo cookie complements the smooth, creamy filling, creating a delightful contrast that is hard to resist. Each bite is a harmonious blend of chocolate and cream cheese, resulting in a rich and satisfying dessert that will leave your taste buds craving more.
These blissful treats are not only delicious but also incredibly versatile. They are ideal for various occasions, whether it’s a birthday party, holiday celebration, or a casual get-together with friends. The bite-sized nature of these sweets makes them a perfect finger food, allowing guests to enjoy them with ease. Additionally, they can be dressed up or down, making them suitable for both informal gatherings and more upscale events.
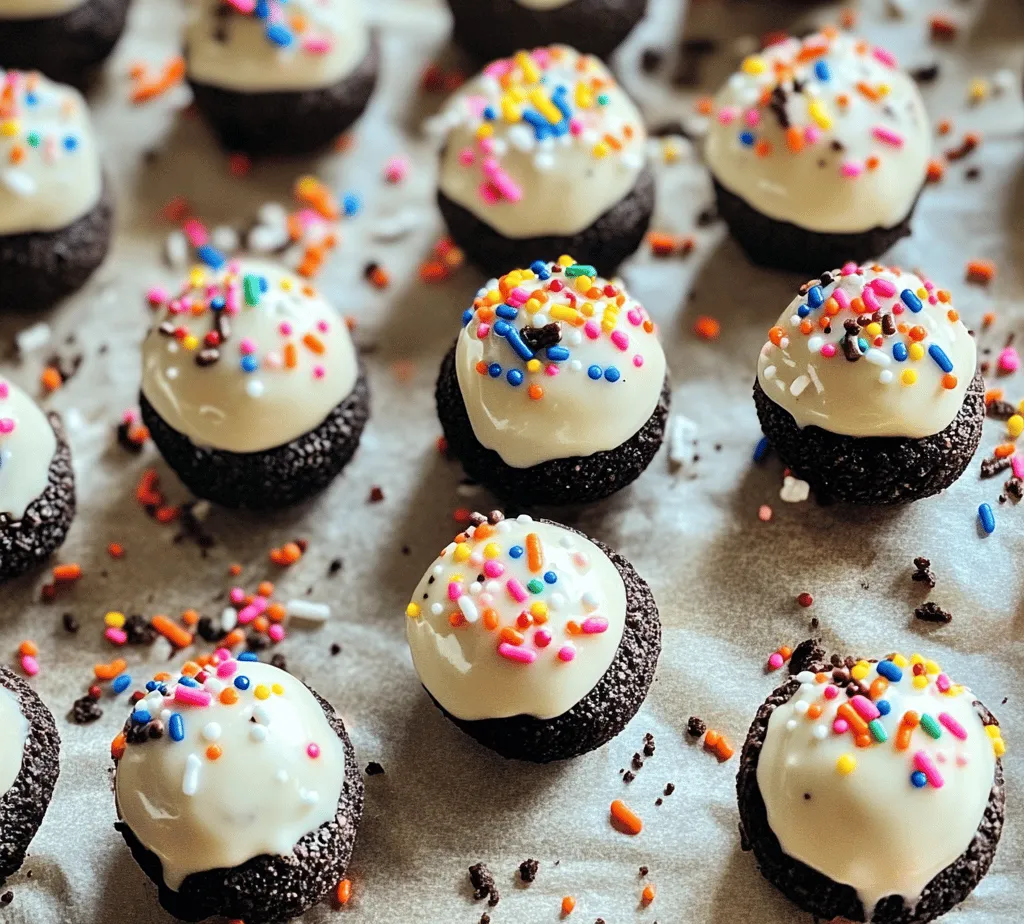
The combination of flavors in Oreo Bliss Bites is what sets them apart. The classic chocolate and cream duo is elevated by the cream cheese, which adds a rich, tangy note that perfectly balances the sweetness of the cookies. When coated in melted white chocolate and garnished with crushed Oreos or colorful sprinkles, these bites become not only a treat for the palate but also a feast for the eyes.
Ingredients Breakdown
To create your own Oreo Bliss Bites, you will need a few simple ingredients, each playing a crucial role in the overall flavor and texture of the final product:
– Oreo Cookies: The star ingredient of this recipe, Oreos provide the base flavor. Their chocolatey crunch serves as the foundation for these bites. You can use regular Oreos or opt for flavored varieties, such as mint or peanut butter, to give a unique twist to your treats.
– Cream Cheese: This ingredient adds a creamy richness that complements the Oreos beautifully. It binds the cookie crumbs together, creating a smooth mixture that is easy to roll into bite-sized balls. Make sure to use softened cream cheese for effortless mixing.
– White Chocolate Chips: These chips are used for coating the Oreo Bliss Bites, adding sweetness and a glossy finish. The creamy white chocolate contrasts with the dark chocolate flavor of the Oreos, creating a visually appealing and delicious treat.
– Coconut Oil (optional): If you want to achieve a smoother consistency for your melted chocolate, a bit of coconut oil can be added. It helps thin out the chocolate for easier coating while adding a subtle coconut flavor.
– Garnishes: To elevate the presentation of your Oreo Bliss Bites, consider adding crushed Oreos or colorful sprinkles as garnishes. These not only enhance the visual appeal but also add a little extra crunch to each bite.
Step-by-Step Instructions
Now that you have a thorough understanding of the ingredients, it’s time to dive into the step-by-step guide to making Oreo Bliss Bites. This comprehensive approach will ensure you achieve the perfect texture and flavor for these delightful treats.
Step 1: Crushing the Oreos
The first step in creating your Oreo Bliss Bites is to crush the Oreos into fine crumbs. This can be done using a few different methods:
– Food Processor: The quickest and most efficient way is to use a food processor. Simply place the Oreos in the bowl and pulse until they reach a fine crumb consistency. Be careful not to over-process, as you want the crumbs to be uniform, not powdery.
– Ziplock Bag: If you don’t have a food processor on hand, you can place the Oreos in a resealable ziplock bag. Seal the bag tightly, ensuring no air is trapped inside, and use a rolling pin or your hands to crush the cookies into fine crumbs. This method can be a great way to involve kids in the kitchen!
Regardless of the method you choose, aim for a crumb consistency that resembles sand. This will help the crumbs combine more easily with the cream cheese.
Step 2: Mixing with Cream Cheese
Once your Oreos are crushed, it’s time to mix them with the cream cheese. In a large mixing bowl, combine the Oreo crumbs with the softened cream cheese. Using a spatula or your hands, mix the two ingredients together until well incorporated.
Make sure the cream cheese is at room temperature to ensure a smooth and even mixture. It’s important to blend thoroughly so that the Oreo crumbs are evenly coated. The mixture should be thick and moldable, allowing you to roll it into balls easily. If the mixture seems too crumbly, you can add a bit more cream cheese to achieve the desired consistency.
Step 3: Rolling into Balls
With the mixture ready, the next step is to form it into balls. Take a small amount of the Oreo and cream cheese mixture (about one tablespoon) and roll it between your palms to form a ball. Aim for uniform size to ensure even coating and presentation.
If the mixture is too sticky, you can lightly dampen your hands with water or coat them in a bit of cocoa powder to prevent sticking. Place the rolled balls onto a baking sheet lined with parchment paper. This will help keep them from sticking and make cleanup easier later on.
Step 4: Chilling
After rolling all the balls, place the baking sheet in the refrigerator to chill for at least 30 minutes. Chilling is crucial, as it helps firm up the mixture, making it easier to coat with chocolate later. This step also enhances the flavors, allowing the Oreo and cream cheese to meld together beautifully.
Step 5: Melting the Chocolate
While the Oreo Bliss Bites are chilling, it’s time to melt the white chocolate chips. You can do this in a couple of ways:
– Microwave: Place the white chocolate chips in a microwave-safe bowl and heat them in 30-second intervals, stirring in between, until completely melted. Be cautious not to overheat, as chocolate can easily seize up.
– Double Boiler: If you prefer, you can melt the chocolate using a double boiler. Fill a pot with a couple of inches of water, bringing it to a simmer. Place a heatproof bowl over the pot, ensuring it doesn’t touch the water, and add the chocolate chips. Stir until melted and smooth.
If you opted for coconut oil, add it to the melted chocolate now. This will ensure a smoother consistency for coating the Oreo Bliss Bites.
With these steps completed, you’re well on your way to creating a batch of delightful Oreo Bliss Bites that are sure to be a hit at any gathering. Stay tuned for the final steps where we will coat these bites in melted chocolate and garnish them for the perfect finishing touch.
Coating the Balls: Tips for Even Coverage and Avoiding Clumps
Once your Oreo Bliss Bites have been rolled into perfectly sized balls, the next step is to coat them in chocolate. This crucial phase not only adds flavor but also enhances the visual appeal of the treats. To achieve an even and smooth coating, start by melting your choice of chocolate—either semi-sweet, dark, or milk chocolate—using a microwave or a double boiler. If using a microwave, melt the chocolate in 30-second intervals, stirring between each interval until fully melted and smooth.
To avoid clumps during the coating process, follow these simple tips:
1. Use the Right Tools: Employ a fork or a dipping tool to help you dip each ball into the melted chocolate. This allows for better control and prevents the balls from rolling around.
2. Tap Off Excess Chocolate: After dipping the balls, gently tap the fork against the edge of the bowl to remove any excess chocolate. This helps avoid a thick layer that can lead to clumping.
3. Work in Batches: Coat a few balls at a time rather than all at once. This keeps the chocolate from hardening prematurely and ensures each ball is evenly coated.
4. Chill Between Coatings: If you prefer a thicker chocolate layer, allow the first coat to set in the refrigerator for about 15-20 minutes before applying a second coat. This will help prevent clumping and ensure a smooth finish.
Decorating: Creative Ideas for Personalizing the Treats
Personalizing your Oreo Bliss Bites not only makes them more visually appealing but also adds a fun twist that reflects your creativity. Here are some delightful decorating ideas to inspire you:
1. Sprinkles: After coating the bites in chocolate, immediately sprinkle them with colorful sprinkles, crushed Oreos, or even edible glitter while the chocolate is still wet. This adds a festive touch and is perfect for birthdays or celebrations.
2. Drizzle: Create a decorative drizzle using melted white chocolate or colored candy melts. Once the bites are fully coated and set, use a piping bag or a fork to drizzle over the top in a zigzag pattern.
3. Themed Toppings: For seasonal treats, consider using themed toppings. For example, use crushed peppermint candies for Christmas or pastel-colored sprinkles for Easter.
4. Flavor Infusion: Enhance the flavor profile by adding flavored extracts to the chocolate coating. A drop of peppermint, almond, or orange extract can offer a unique twist to the classic Oreo flavor.
Final Chill: Importance of Setting the Chocolate Before Serving
Once you have decorated your Oreo Bliss Bites, it’s essential to allow the chocolate coating to set properly. Place the coated bites on a parchment-lined baking sheet and refrigerate them for at least 30 minutes. This final chilling step ensures that the chocolate hardens completely, creating a satisfying snap when bitten into. It also helps the flavors meld together, enhancing the overall taste experience. Serving these bites at room temperature can be delightful, but ensure they are chilled adequately before serving to maintain their structure.
Nutritional Information
Understanding the nutritional content of your Oreo Bliss Bites can help you enjoy them guilt-free. Here’s an overview of what to expect per serving (approximately two bites):
– Calories: 150-200
– Total Fat: 8-10 grams
– Saturated Fat: 4-6 grams
– Sugars: 12-15 grams
While these treats are undoubtedly delicious, they can be high in calories and sugars. If you’re looking for healthier alternatives, consider the following substitutions:
– Reduced-Fat Cream Cheese: Use reduced-fat cream cheese instead of regular cream cheese to cut down on fat and calories.
– Sugar Substitutes: Experiment with natural sweeteners like stevia or erythritol in the chocolate coating for a lower sugar option.
– Dark Chocolate: Opting for dark chocolate can provide health benefits, as it contains less sugar and more antioxidants than milk chocolate.
Serving Suggestions
Oreo Bliss Bites are versatile and fit perfectly into various occasions. Here are some serving ideas:
1. Parties and Gatherings: Serve these treats at birthday parties, holiday gatherings, or potlucks. They are always a hit and can be arranged on platters for easy access.
2. Dessert Tables: Create a dessert table featuring your Oreo Bliss Bites alongside other sweets like brownies, cupcakes, and fruit. They can be a delightful addition to any dessert spread.
3. Pairing Suggestions: Complement these bites with beverages such as milk, coffee, or hot chocolate. The rich flavors pair wonderfully with a variety of drinks, enhancing the overall dessert experience.
4. Creative Presentation: For special occasions, consider presenting your Oreo Bliss Bites in decorative cupcake liners or small treat bags tied with ribbons. This adds a personal touch and makes them perfect for gifting.
Storage Tips
To keep your Oreo Bliss Bites fresh, proper storage is key. Here are best practices for storing your treats:
– Refrigeration: Store the bites in an airtight container in the refrigerator. They will stay fresh for up to one week. Ensure that the container is sealed tightly to prevent moisture from getting in.
– Freezing: For longer storage, you can freeze the bites. Place them in a single layer on a baking sheet until firm, then transfer to a freezer-safe container or bag. They can be stored in the freezer for up to three months.
– Thawing: When ready to enjoy, remove the bites from the freezer and let them thaw in the refrigerator for a few hours. Avoid defrosting them at room temperature to maintain the texture of the chocolate coating.
Variations of Oreo Bliss Bites
Get creative with your Oreo Bliss Bites by trying out different variations. Here are some ideas to expand on the original recipe:
1. Flavor Variations: Use different types of Oreos for unique flavors. Double-Stuffed Oreos will add extra creaminess, while seasonal flavors like Pumpkin Spice or Red Velvet can create a festive twist.
2. Alternative Coatings: While classic chocolate coating is a favorite, consider using white chocolate or even a mix of both dark and white chocolate for a marbled effect.
3. Additional Mix-Ins: Add texture and flavor by incorporating mix-ins such as chopped nuts, coconut flakes, or flavored extracts like vanilla or almond into the Oreo mixture.
Conclusion
Making Oreo Bliss Bites is an enjoyable and straightforward process that yields delicious results. These treats are not only easy to prepare but also offer endless opportunities for customization based on your preferences. From the rich chocolate coating to the delightful crunch of Oreos, every bite is sure to bring joy.
We encourage you to experiment with the recipe, try different variations, and share these delightful creations with friends and family. Whether it’s for a special occasion or just a sweet treat at home, Oreo Bliss Bites are bound to be a hit. Enjoy the process of making and sharing these wonderful bites, and let your creativity shine as you personalize them to your taste!
