Introduction
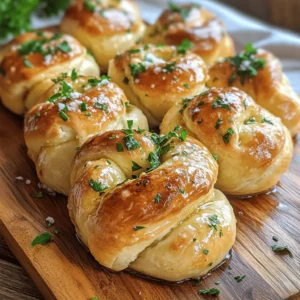
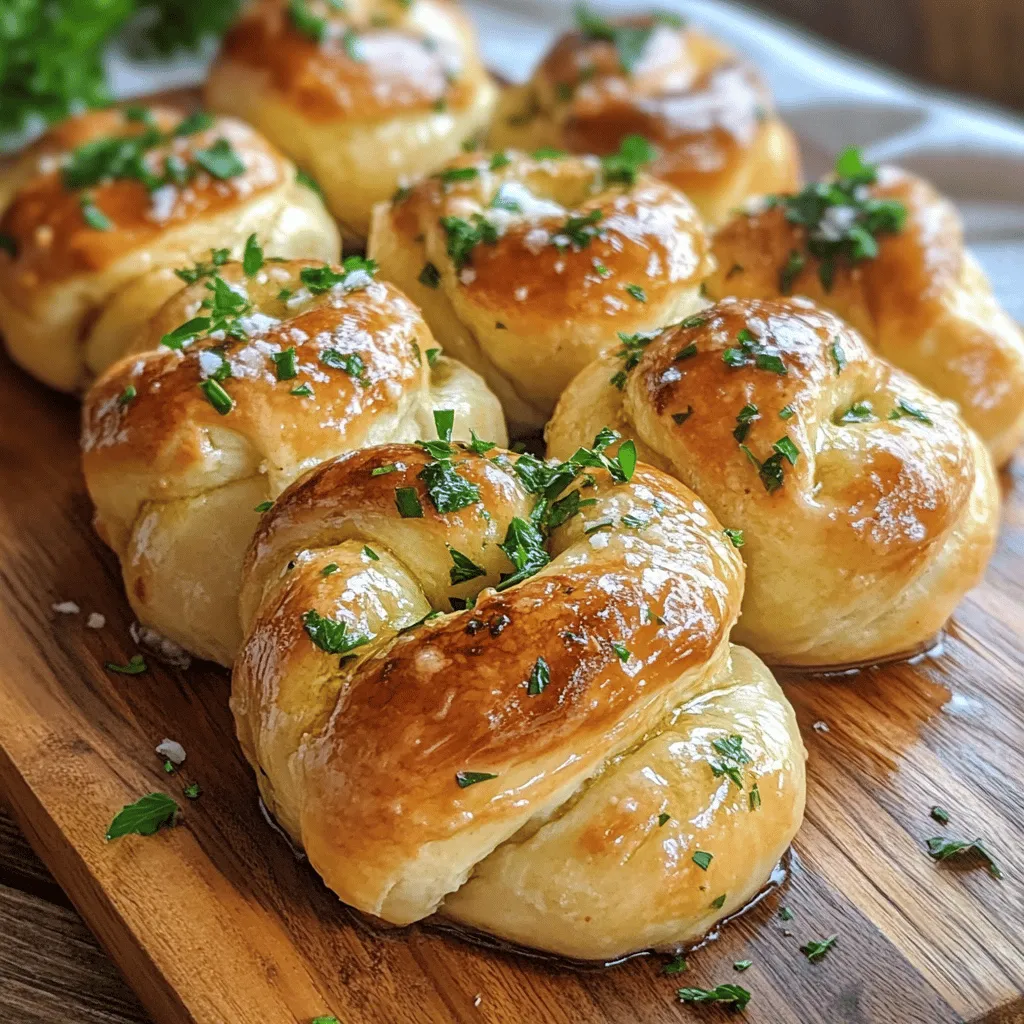
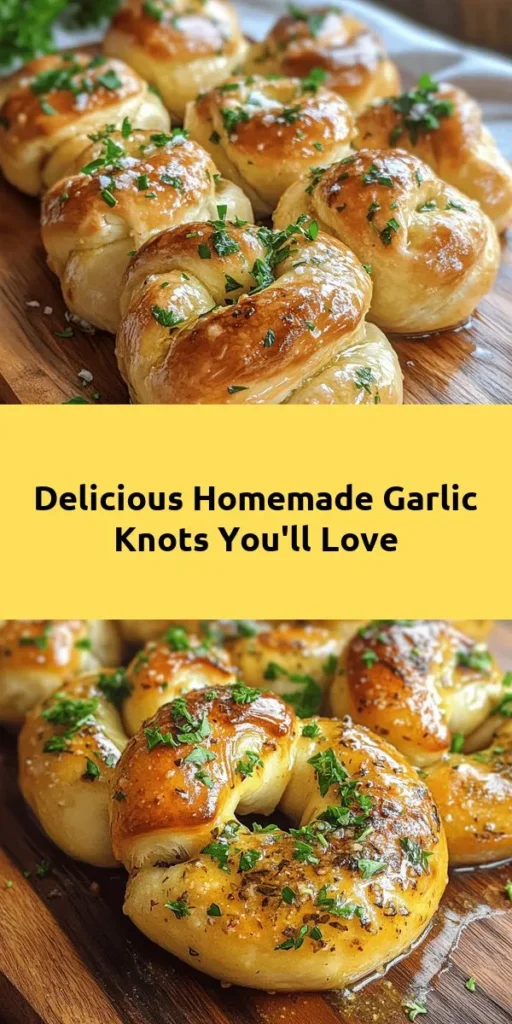
Garlic knots are a beloved staple in Italian-American cuisine, known for their delightful blend of flavors and irresistible aroma. These fluffy, buttery knots are the perfect appetizer or side dish, often served alongside marinara sauce or as a complement to your favorite pasta dish. While you can easily find garlic knots at your local pizzeria or bakery, nothing beats the freshness and satisfaction of making them at home.
When you opt for homemade garlic knots, you have complete control over the ingredients, ensuring that each bite bursts with the perfect combination of garlic, butter, and herbs. The process of mixing, kneading, and baking your dough not only fills your kitchen with an enticing smell but also creates a sense of accomplishment. This recipe will guide you through making your very own batch of homemade garlic knots that are sure to impress family and friends.
Understanding Garlic Knots
Garlic knots are not just a delicious treat; they have a rich history that adds to their charm. Originating in the United States, particularly within Italian-American communities, garlic knots were created as a way to utilize leftover pizza dough. Bakers would tie small pieces of dough into knots, bake them until golden, and then immerse them in a fragrant garlic butter sauce. This resourceful approach quickly gained popularity, turning garlic knots into a staple at pizzerias and Italian restaurants across the country.
The cultural significance of garlic knots extends beyond their humble beginnings. They embody the spirit of sharing and community, often enjoyed during family gatherings, parties, or casual dinners with friends. The joy of breaking bread—or in this case, knots—together fosters connection and celebration. As you prepare to make your own garlic knots, think of the laughter and conversations that will accompany them, making your culinary experience even more meaningful.
The Ingredients Breakdown
All-Purpose Flour
The foundation of any great garlic knot lies in the dough, and all-purpose flour is the primary ingredient that provides structure. Its balanced protein content allows for the development of gluten, which gives the knots their chewy and airy texture. When selecting flour, opt for a high-quality brand to ensure the best results.
Active Dry Yeast
Active dry yeast is a key component that helps your dough rise. This leavening agent works by consuming sugars and producing carbon dioxide, which creates the airy texture that we love in garlic knots. It’s essential to store your yeast properly and check its expiration date to ensure it’s active before using it in your recipe.
Warm Water and Sugar
The science behind activating yeast involves warm water and a touch of sugar. Warm water (not boiling) helps to dissolve the yeast, while sugar serves as food for the yeast, kickstarting the fermentation process. This combination is crucial for achieving the desired rise in your dough.
Olive Oil and Butter
Both olive oil and butter contribute to the flavor and moisture of your garlic knots. Olive oil adds a subtle richness and enhances the overall taste, while butter provides that luscious buttery finish that pairs so well with garlic. Using a combination of the two ensures that your knots are both flavorful and tender.
Garlic and Herbs
Garlic is the star ingredient in this recipe, providing that classic, aromatic flavor that garlic knots are famous for. Fresh garlic, when minced and combined with butter, infuses the knots with a mouthwatering taste. Additionally, herbs such as parsley or oregano complement the garlic, adding freshness and depth to the overall flavor profile.
Optional Ingredients
For those who want to elevate their garlic knots even further, consider adding garlic powder or red pepper flakes. Garlic powder enhances the garlic flavor, while red pepper flakes can provide a subtle heat, making your garlic knots even more irresistible. These optional ingredients allow you to customize your knots to suit your personal taste.
Step-by-Step Instructions
Preparing the Dough
To kick off your homemade garlic knots journey, start by preparing the dough. Accurate measurements are crucial for achieving the right texture, so it’s best to use a kitchen scale if possible. Begin by measuring out the all-purpose flour and placing it in a large mixing bowl.
Next, activate the yeast by combining warm water and sugar in a small bowl. Stir gently and let it sit for about five minutes, or until it becomes frothy. This step is vital, as it ensures that your yeast is alive and ready to work its magic.
Once your yeast is activated, add it to the flour along with the olive oil and salt. Mix the ingredients until everything is well combined. At this stage, you may find it easier to switch to using your hands or a wooden spoon to form the dough.
Kneading is an essential part of the dough-making process. Transfer your dough to a floured surface and knead it for about 8-10 minutes. This technique helps to develop gluten, creating a smooth and elastic texture. If your dough feels too sticky, sprinkle a little extra flour as needed, but be careful not to add too much, as it can lead to dense knots.
Letting the Dough Rise
After kneading, it’s time to let your dough rise, which is a critical step in creating light and airy garlic knots. Transfer the dough to a lightly greased bowl, cover it with a clean kitchen towel or plastic wrap, and place it in a warm area free from drafts. Allow the dough to rise for about 1 to 1.5 hours, or until it has doubled in size.
Proofing, as this process is known, allows the yeast to ferment and produce carbon dioxide, which expands the dough. This step is instrumental in achieving the fluffy texture characteristic of garlic knots. While you wait, you can prepare the garlic butter sauce that will later coat your knots, ensuring that every bite is infused with delicious flavor.
Once the dough has risen, you can proceed to shape your garlic knots, creating a delightful treat that will soon be ready to bake and enjoy. Stay tuned for the next part of the article, where we’ll walk you through the final steps of shaping, baking, and enjoying these homemade garlic knots!
Shaping the Garlic Knots
Shaping your garlic knots is a crucial step that can determine their final appearance and texture. To start, take the risen dough and gently punch it down to release any air bubbles. Then, divide the dough into equal portions; typically, 12 to 16 pieces yield perfectly sized knots. Aim for uniformity in size — this ensures even baking. Each piece should weigh approximately 1.5 to 2 ounces for consistent results.
Tips for Achieving Uniformity in Size and Shape
One of the simplest methods for achieving uniformity is to use a kitchen scale. Weigh each piece of dough as you cut it to ensure they are equal in size. If you don’t have a scale, roll each piece into a small ball before stretching it into a rope. This method allows you to visually gauge the size of each knot.
Visual Cues to Look for During the Shaping Process
As you shape your knots, keep an eye out for a few visual cues:
– Smooth Surface: Each piece of dough should have a smooth surface; this indicates proper gluten development.
– Elasticity: The dough should spring back slightly when pressed, showing it has rested adequately.
– Rope Length: Aim for about 6-8 inches in length when rolling out the dough. This length is optimal for tying a knot without stretching the dough too thin.
Once shaped, place the knots on a parchment-lined baking sheet, making sure to leave space between each one, as they will expand during baking.
Preparing the Garlic Butter
Garlic knots wouldn’t be complete without the rich, flavorful garlic butter that coats them. The key to perfect garlic butter lies in the balance of ingredients — garlic, herbs, and spices.
The Art of Balancing Flavors: Garlic, Herbs, and Spices
To prepare the garlic butter, melt 1/2 cup of unsalted butter in a small saucepan over low heat. Add 4-5 cloves of minced garlic, allowing them to infuse their flavor into the butter without burning. To this mixture, stir in one teaspoon of dried oregano, half a teaspoon of salt, and a pinch of crushed red pepper for a hint of spice. Fresh herbs, such as parsley or basil, can also be added for an aromatic touch. The goal is to create a blend that is rich in garlic flavor but balanced with the freshness of herbs.
Cooking Techniques to Enhance the Aroma and Taste
For an extra depth of flavor, consider lightly toasting the minced garlic in the butter before adding the other ingredients. This will create a nutty aroma and a more complex flavor profile. Just be cautious to avoid browning the garlic too much, as it can develop a bitter taste. Once the garlic butter is ready, set it aside to cool slightly, allowing the flavors to meld.
Baking the Knots
Now that your garlic knots are shaped and your garlic butter is prepared, it’s time to bake!
Ideal Oven Temperature and Baking Time for Perfect Results
Preheat your oven to 400°F (200°C). This temperature is ideal for achieving a golden-brown crust while ensuring the inside remains soft and fluffy. Place the baking sheet with the knots in the oven and bake for 15 to 20 minutes or until they are puffed up and golden brown.
Signs of Doneness to Ensure the Knots Are Baked Properly
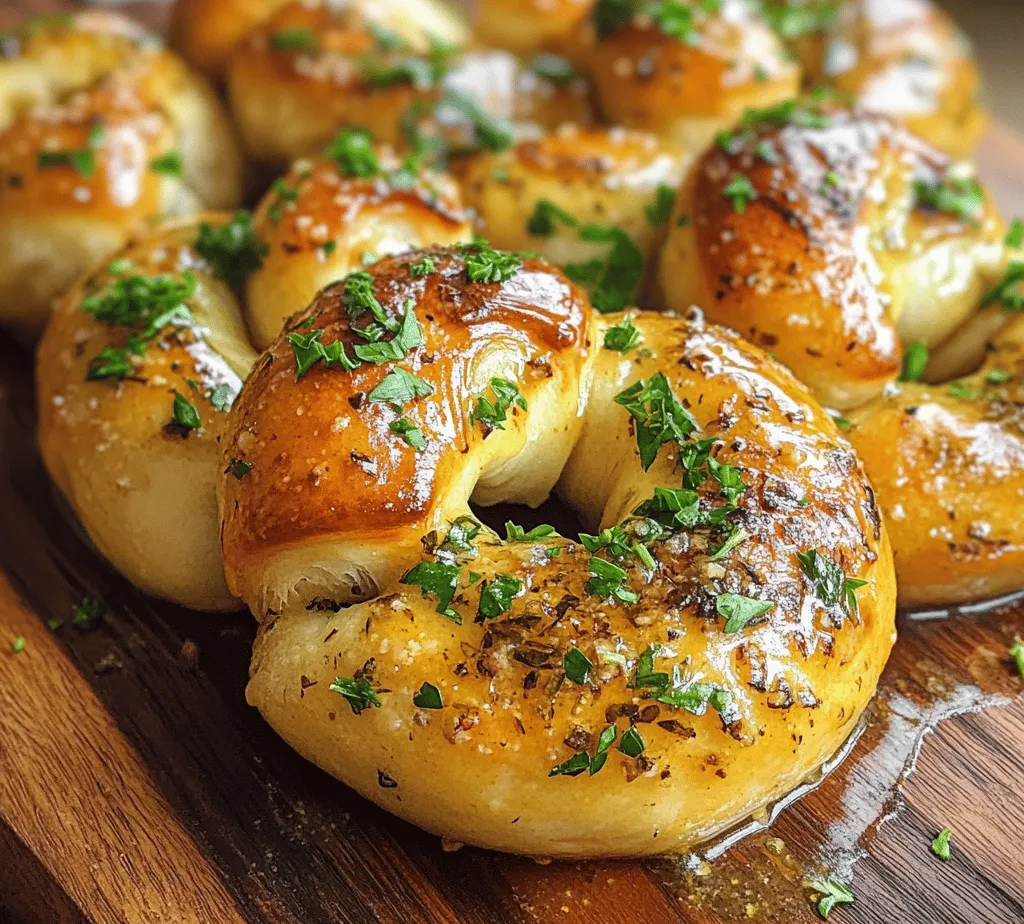
To check for doneness, look for a golden-brown color on the top of the knots. They should also feel firm to the touch when lightly pressed. For an added assurance, you can insert a toothpick into the center of a knot; it should come out clean. If you desire a more pronounced garlic flavor, brush the knots with additional garlic butter as soon as they come out of the oven.
Serving Suggestions
Garlic knots are best enjoyed warm and fresh out of the oven, making them an ideal appetizer or side dish.
Best Practices for Serving Garlic Knots Warm
Serve the garlic knots on a warm platter, drizzled with any remaining garlic butter for an enticing presentation. You can sprinkle chopped fresh parsley on top for a pop of color and freshness.
Pairing Ideas with Marinara Sauce, Pesto, or Cheese Dips
Garlic knots pair beautifully with a variety of dipping sauces. Marinara sauce is a classic choice, but you can also serve them with basil pesto for a fresh twist or a creamy cheese dip for indulgence. If you’re feeling adventurous, try adding a spicy arrabbiata sauce for a kick or a garlic aioli for extra garlic lovers.
Creative Serving Styles for Parties or Family Gatherings
For parties or gatherings, consider presenting garlic knots in a creative way. Arrange them in a basket lined with a cloth napkin, or serve them on a wooden board with small bowls of different dipping sauces. You can even create a garlic knot bar, where guests can customize their knots with various toppings like grated Parmesan cheese, extra herbs, or a drizzle of balsamic glaze.
Storage and Reheating Tips
If you have leftover garlic knots (which is unlikely but possible!), proper storage will ensure they remain fresh and delicious.
Proper Storage Techniques to Maintain Freshness
Allow the garlic knots to cool completely before storing them. Place them in an airtight container or a resealable plastic bag. You can also wrap them in aluminum foil to keep them from drying out. Stored this way, they will stay fresh for up to 3 days at room temperature or up to a week in the refrigerator.
Methods for Reheating to Preserve Taste and Texture
To reheat garlic knots, preheat your oven to 350°F (175°C). Place the knots on a baking sheet and cover them with aluminum foil to prevent them from becoming too hard. Heat for about 10 minutes, or until warmed through. Alternatively, you can microwave them for 20 to 30 seconds, but be cautious, as microwaving can make them chewy rather than fluffy.
Nutritional Information
While garlic knots are indeed a delightful indulgence, it’s essential to be aware of their nutritional content.
Overview of the Nutritional Content per Serving
A serving of garlic knots (approximately two knots) contains about 200 calories, 10 grams of fat, 25 grams of carbohydrates, and 4 grams of protein. They are a source of carbohydrates, primarily from the flour, and the garlic and herbs provide some beneficial properties.
Discussion on Balancing Indulgence with Health-Conscious Choices
While garlic knots can be a part of a balanced diet, moderation is key. To make them a bit healthier, consider using whole wheat flour instead of all-purpose flour, which will increase fiber content. You can also reduce the amount of butter used or substitute with olive oil for a healthier fat option.
Conclusion
Making homemade garlic knots is not just about the final product; it’s about the joy of creating something delicious from scratch. The aroma wafting through your kitchen, the anticipation as they bake, and the satisfaction of pulling them out of the oven golden and fluffy is an experience worth savoring.
Encourage yourself to experiment with variations — add cheese, spices, or different herbs to the garlic butter for a unique twist on this classic recipe. Homemade food fosters connection, and sharing your creations with family and friends can lead to lasting memories. So, gather your loved ones around the table and enjoy the delightful experience of homemade garlic knots together.